BEAS (Biometric Encryption & Authentication Solution) requires BEASWindowsServices (to be installed separately) for full functionality. It is a state-of-the-art software designed to enhance user experience and engagement by providing robust encryption and authentication features for the Windows operating system. It leverages biometrics and other authentication techniques, including Windows Hello, to create a more secure environment for both individual users and organizations, significantly reducing the risk of data breaches and social engineering attacks.
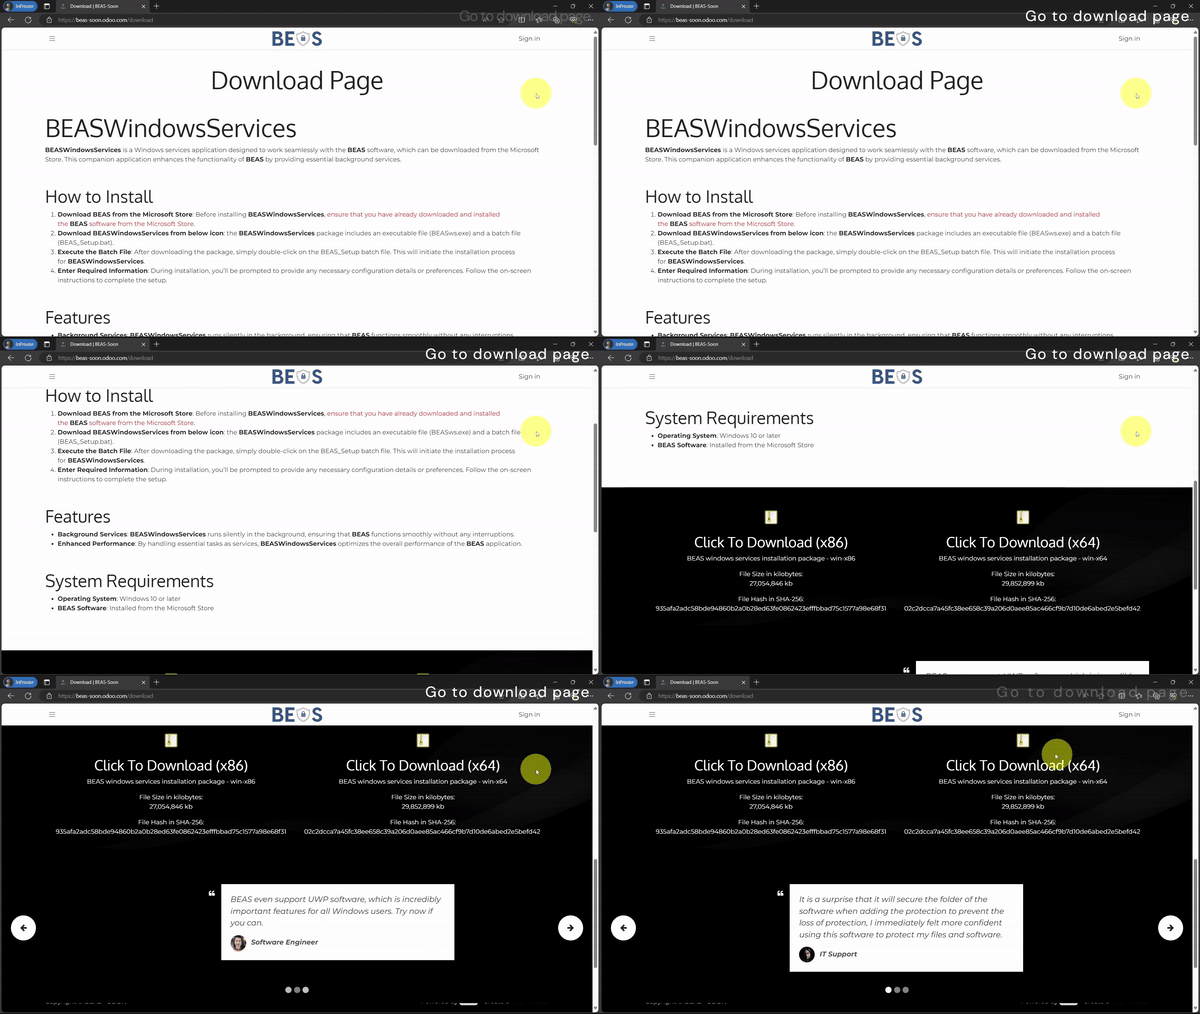
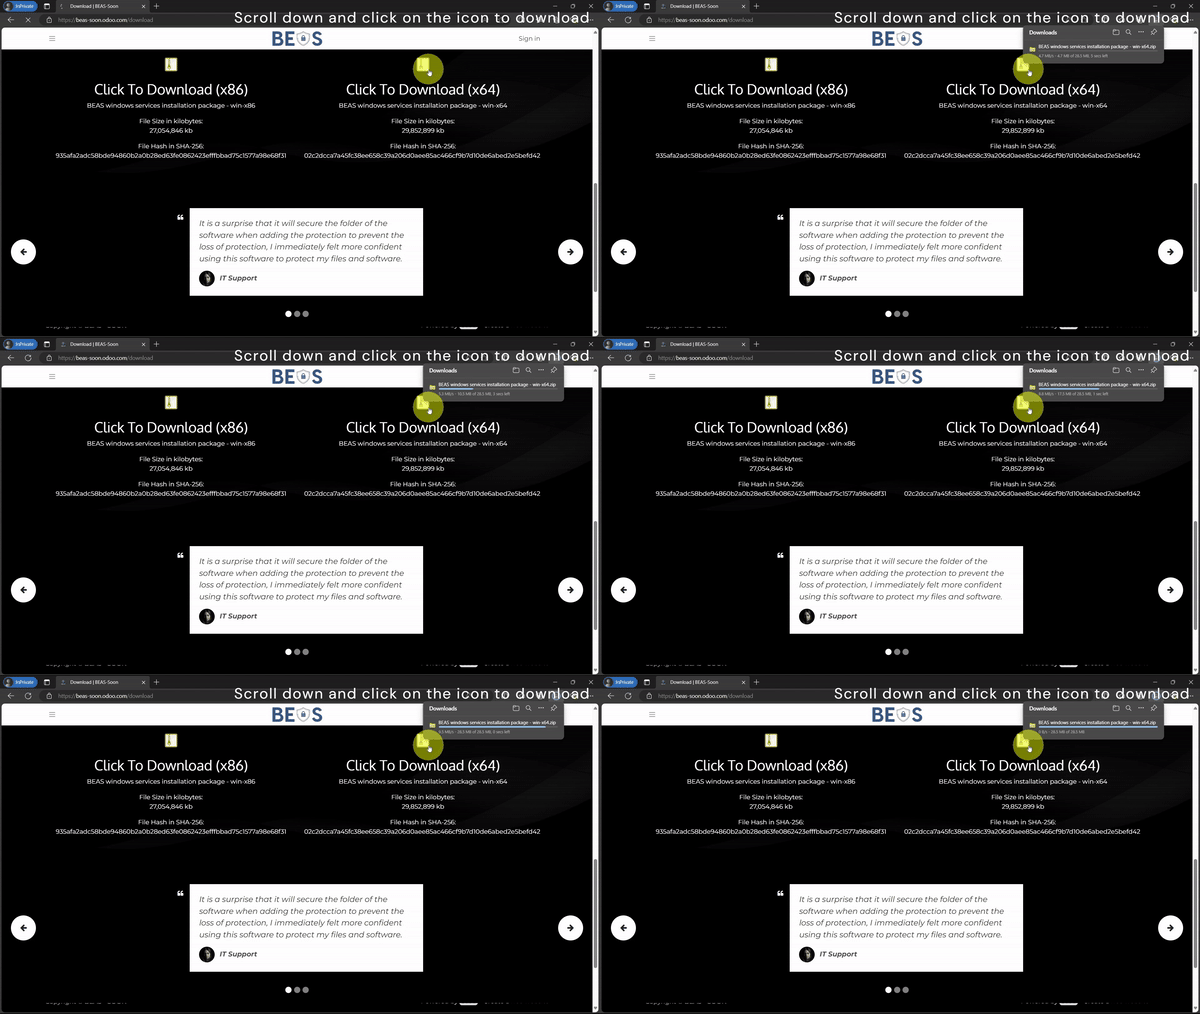
Step 1: Downloading the Installation Package
Navigate to the download page and scroll down until you find the download icon. Click on it to download the zip file. Please note that there are two versions of the downloaded files: x86 and x64. To determine which version is compatible with your PC, check your system architecture. You can do this by looking at the ‘System Type’ in your System Information.
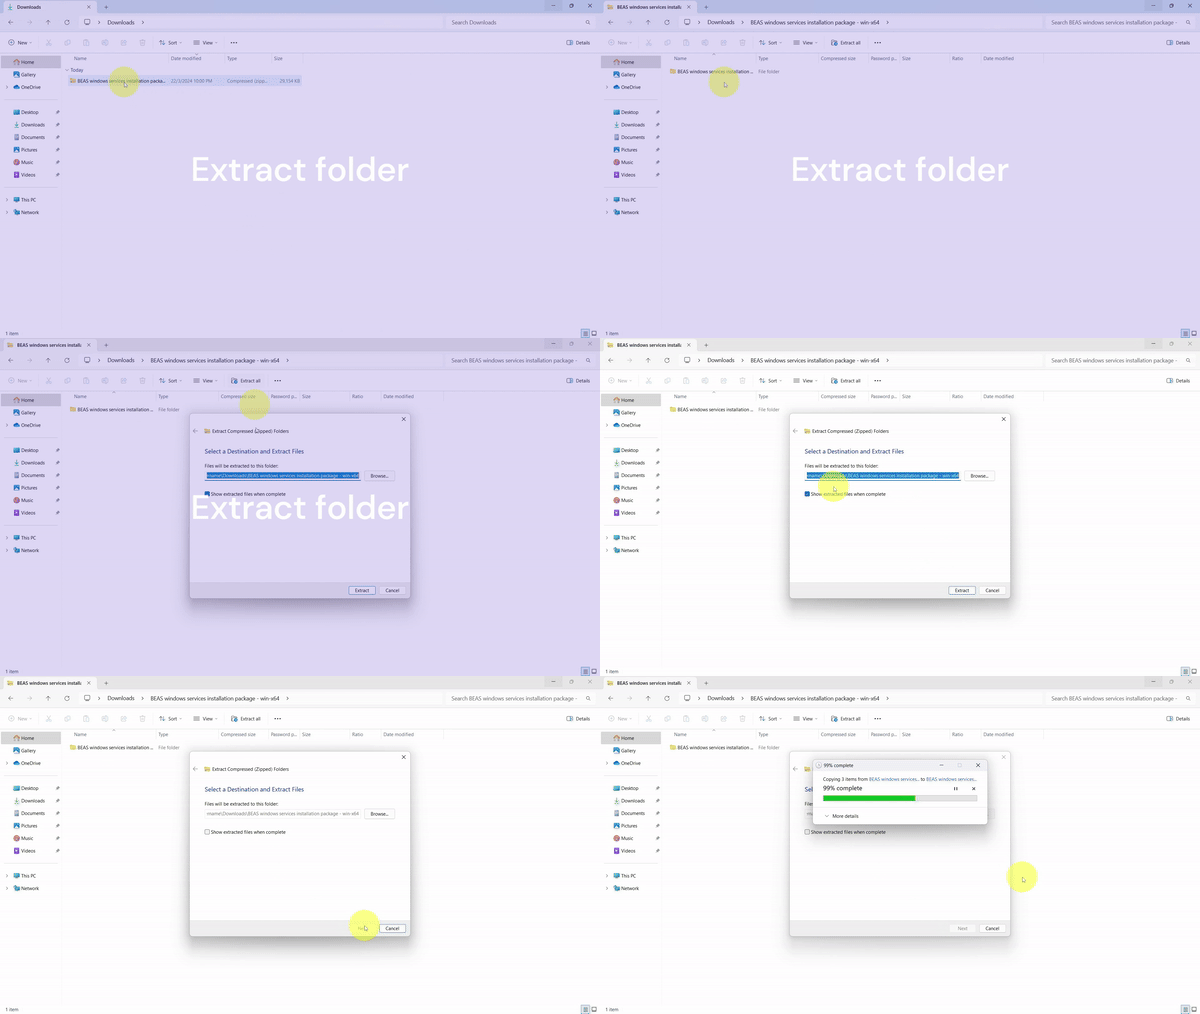
Step 2: Extracting the Installation Package
Once the download is complete, navigate to the download path and extract the folder. Follow the instructions provided in the image to successfully extract the installation package.
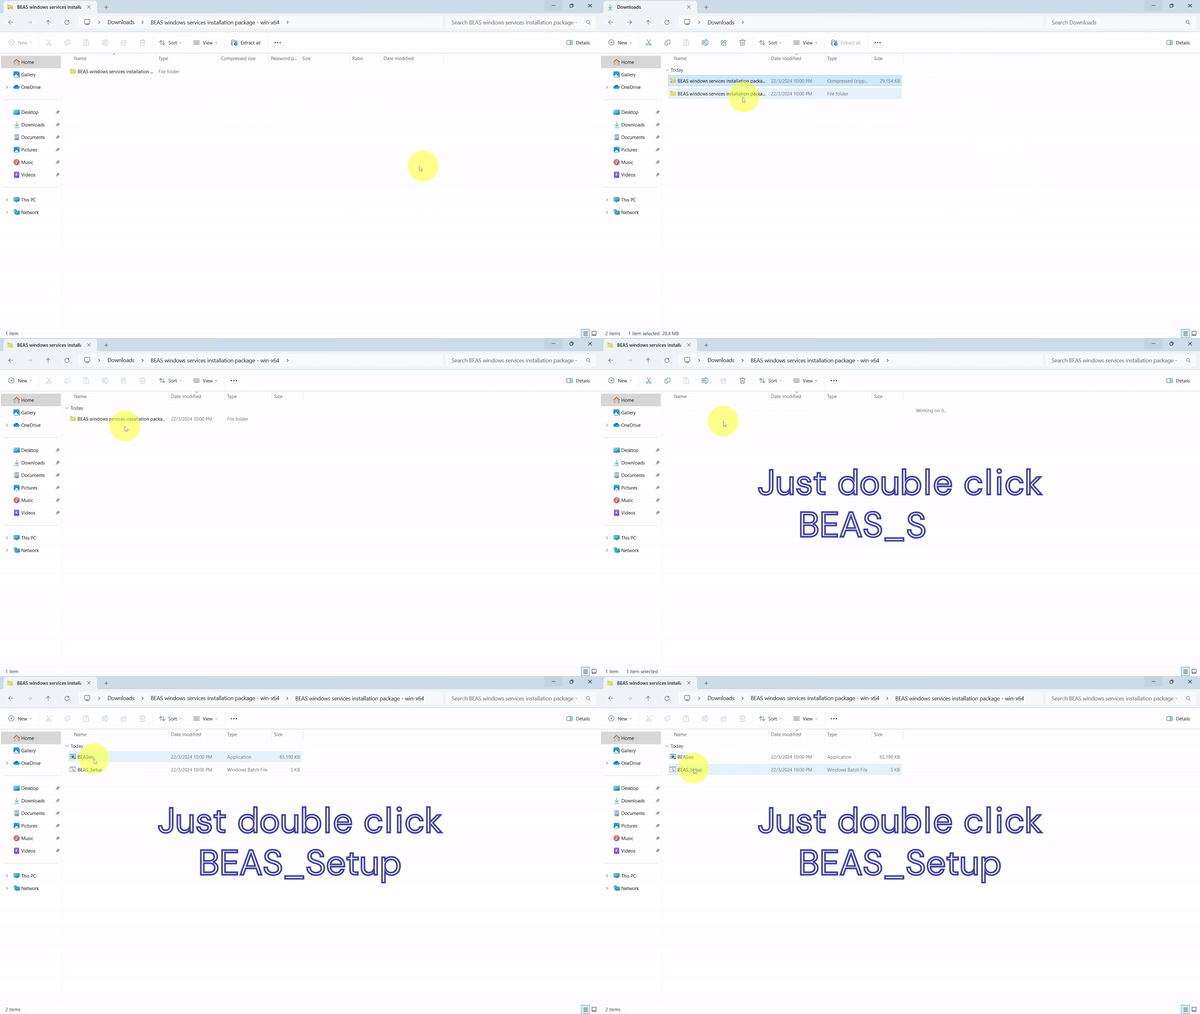
Step 3: Running the Installation File
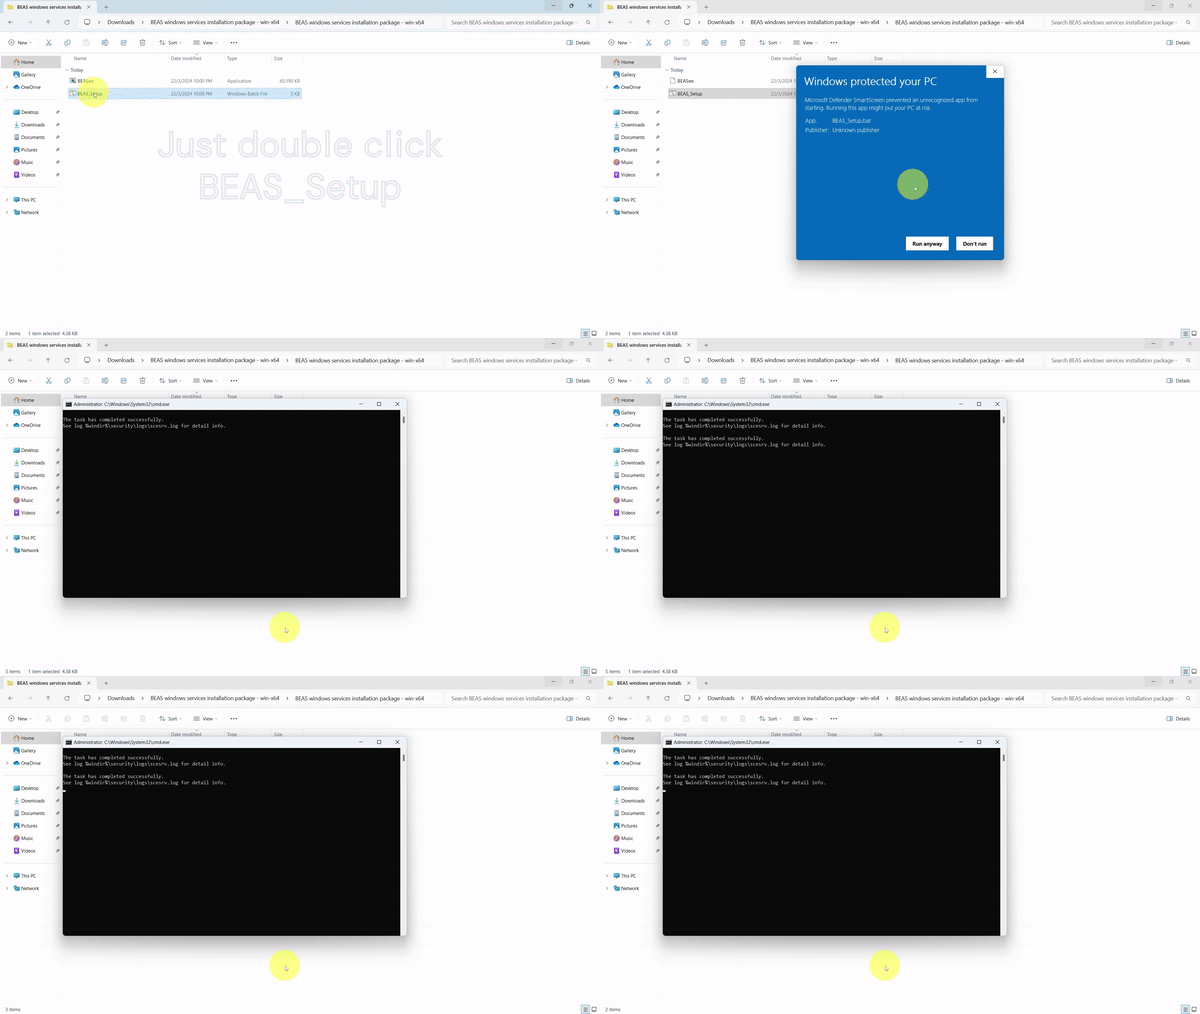
After extraction, open the BEAS Windows Services installation package and double-click on the ‘BEAS_Setup.bat’ file to execute it.
Step 4: Bypassing Windows Security
While executing the ‘BEAS_Setup.bat’ file, Windows might display a window saying ‘Windows protected your PC’. This is a standard security feature designed to prevent unrecognized apps from running on your PC. However, since you trust this application, you can bypass this by clicking on ‘More Info’ and then ‘Run Anyway’.
Step 5: Running as Administrator
The installation process will prompt you to run the file as an administrator. This is necessary to ensure the file runs properly.
Step 6: Entering User Credentials
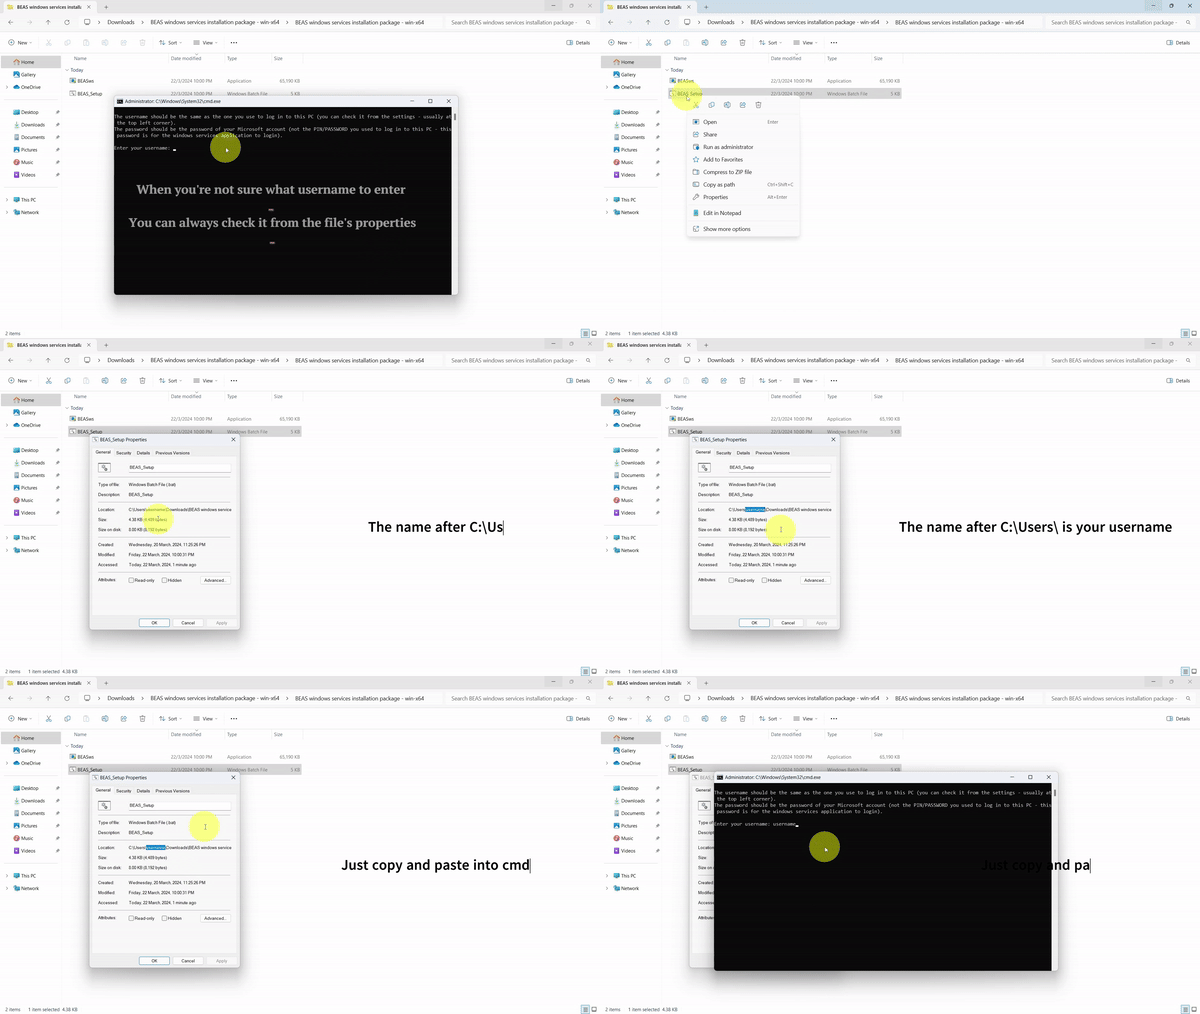
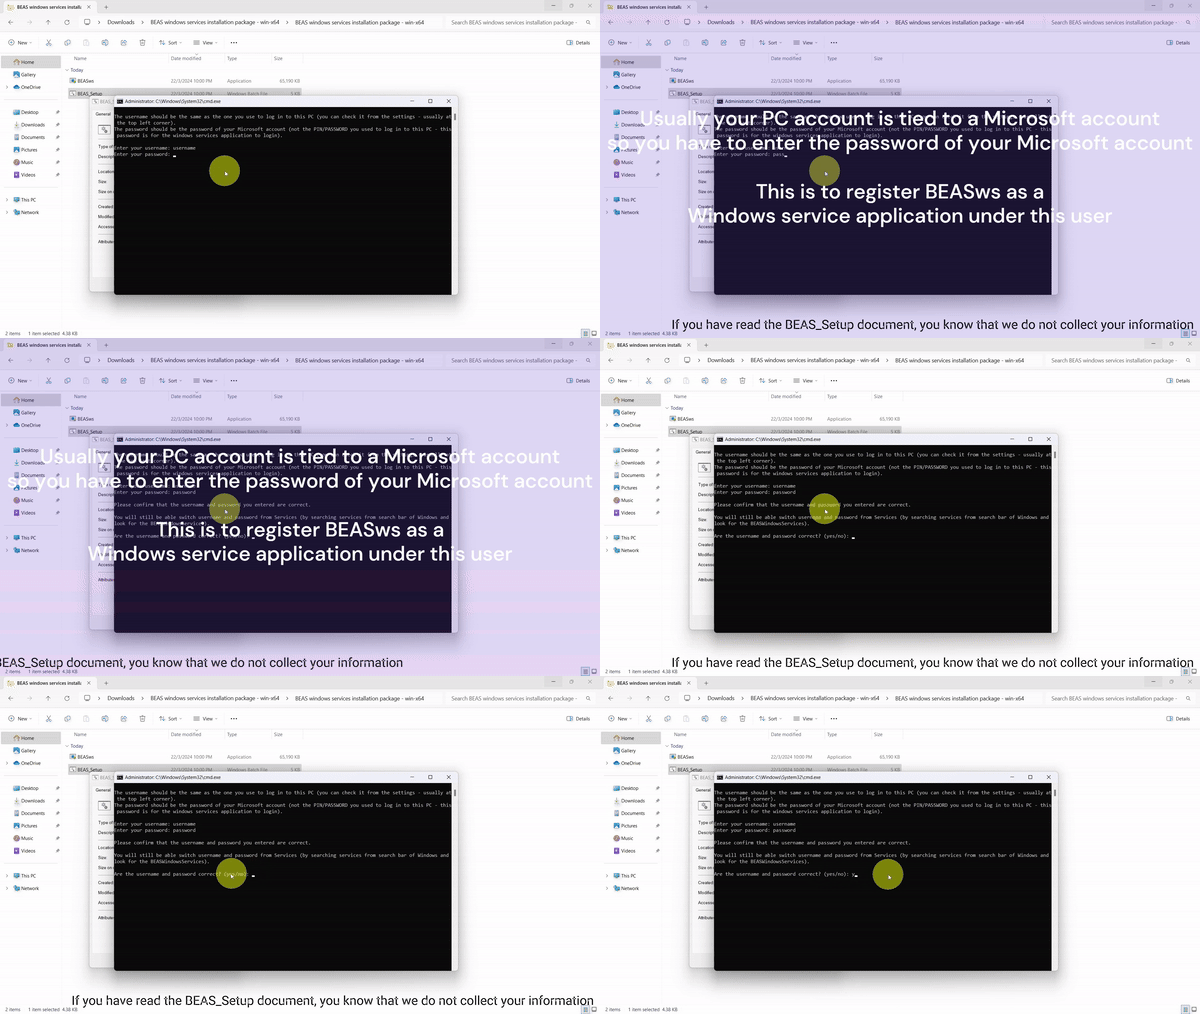
During the execution of the ‘BEAS_Setup.bat’ file, a command prompt will appear asking users to enter their username and password. This is required to set the BEASWindowsServices to log on to the user’s account. If you’re unsure about what username to enter, refer to the provided image for step-by-step instructions.
Step 7: Privacy Assurance
Rest assured, your information will not be collected. It is merely passed to Windows to handle the log on of the Windows Services application. If you’re concerned about potential password leaks, you can disconnect from the internet and execute the file. You can also read through the ‘BEAS_Setup.bat’ file to verify that no personal information is collected.
Step 8: Restarting Your PC
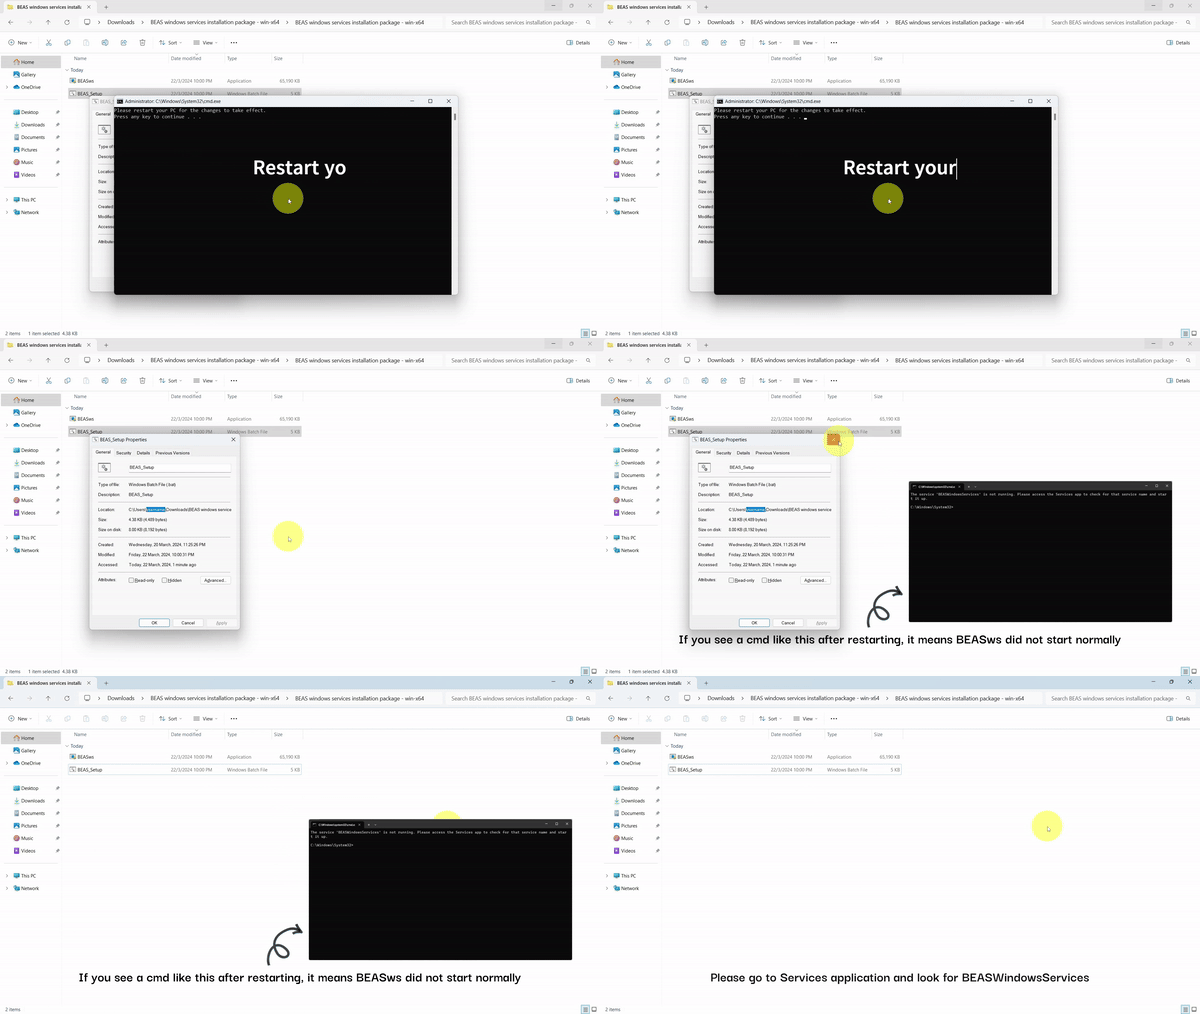
Once the installation is complete, the command prompt will instruct users to restart their PC. If another command prompt appears stating ‘BEASWindowsServices is not running…’, it indicates that the BEASWindowsServices did not start up normally, possibly due to an error with the username and password.
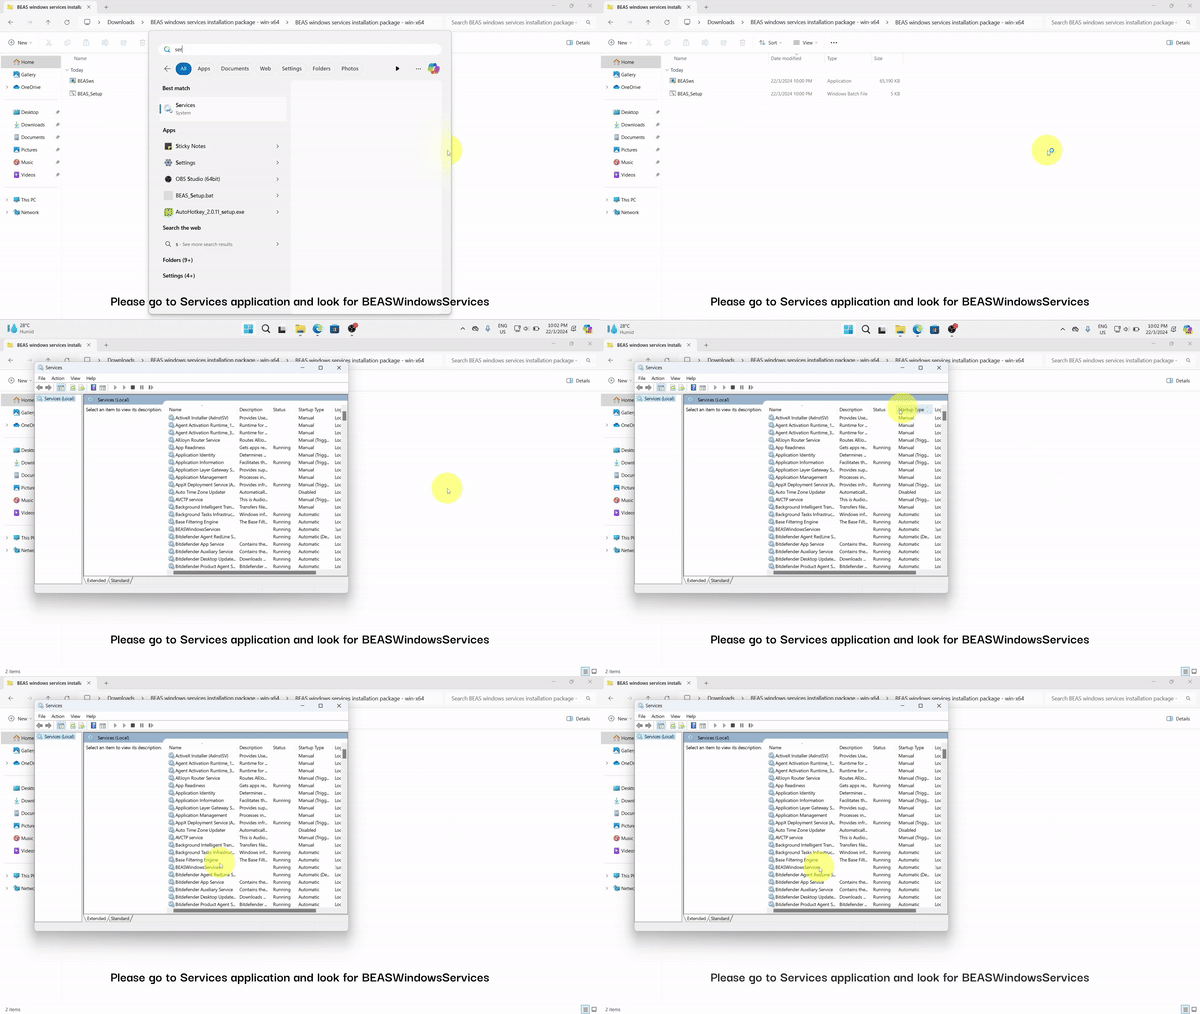
Step 9: Verifying the Installation
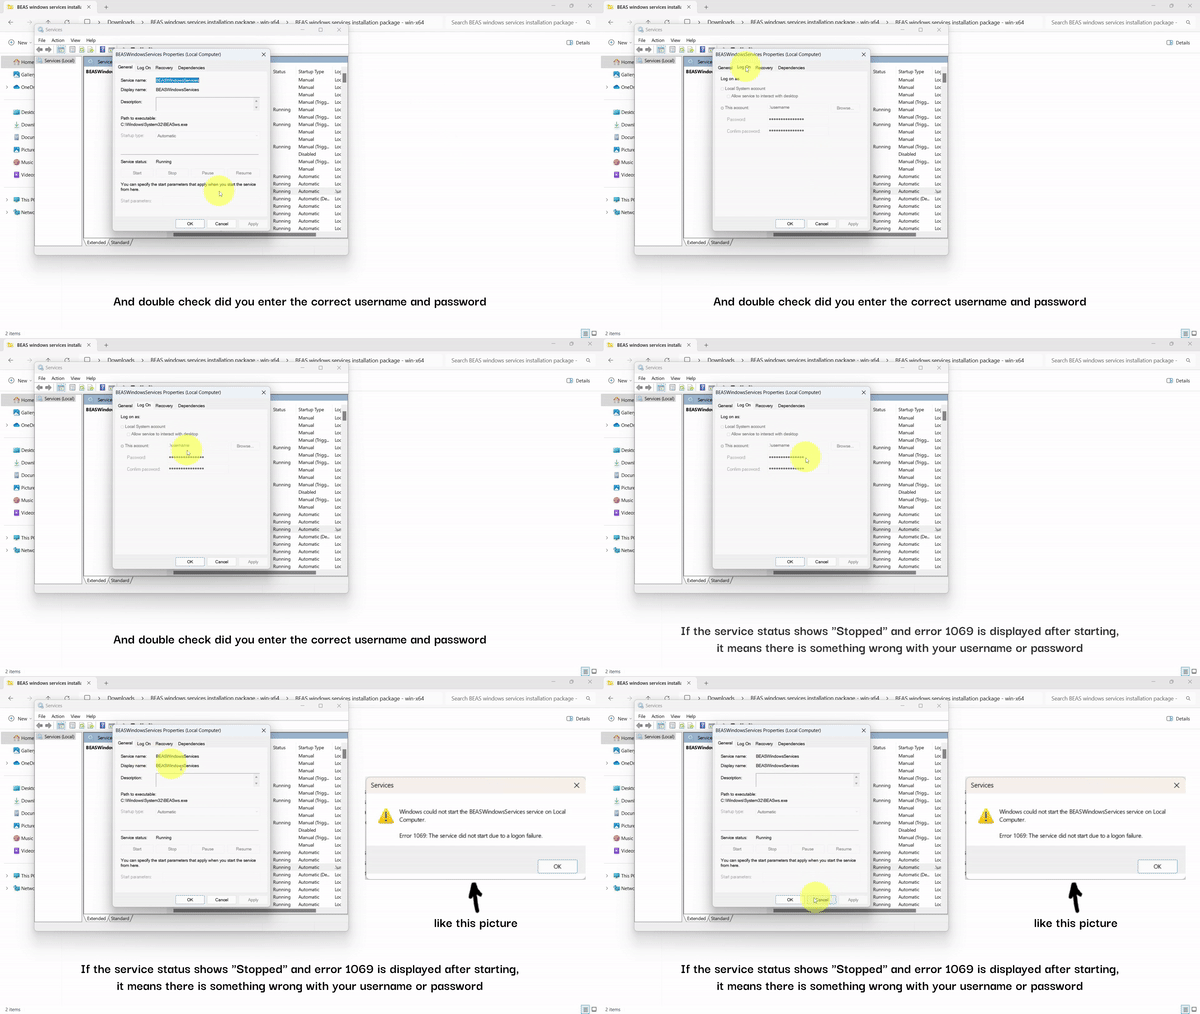
In case of that issues, check the Services application and look for the service name, BEASWindowsServices. Click on it and check for potential issues. If the BEASWindowsServices shows the status of ‘Stopped’ and error 1069 appears after starting it up, it suggests there are errors with your username or password. Also, verify the information displayed in the General tab matches the one in the provided image. The path to the executable should be ‘C:\Windows\System32\BEASws.exe’.
Step 10: Enjoy Your BEAS Software
If there are no issues after rebooting your PC, then you’re all set! Enjoy using your BEAS software.
Link to BEASWindowsServices Installation Guide - EN
Link to BEASWindowsServices Installation Guide - CN